Choosing a date range
Last updated: November 5, 2026
You can change the time period your data covers, and how it's grouped over time, with the two controls at the top right of a dashboard.
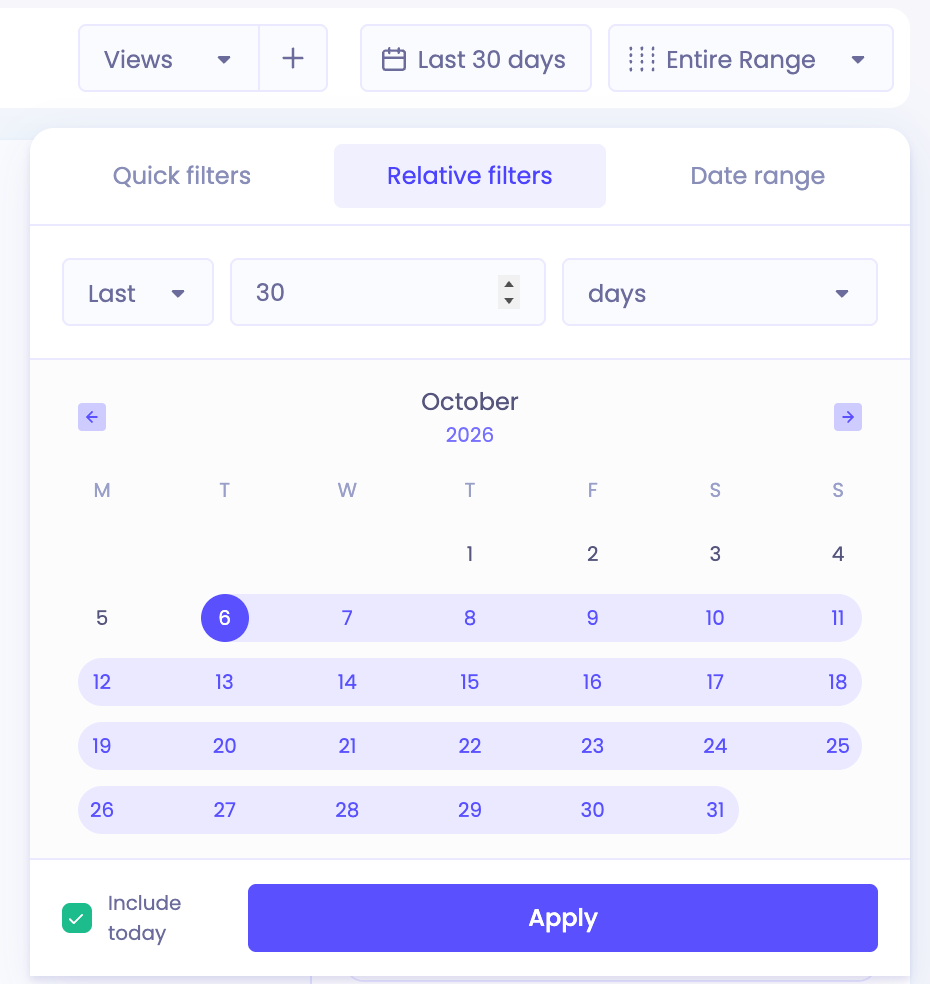
Choosing a date range
Click the date range button at the top right, for example Last 30 days.
Choose a tab and pick your range:
Tab | What it does | Example |
|---|---|---|
Quick filters | Picks a common range for you | Yesterday, Month to date, Last year, BFCM 2025, All time |
Relative filters | Counts back from today, for example the last 30 days. Tick Include today to include the current day | Last 30 days |
Date range | Lets you pick a start and end date on a calendar | 1 March to 15 April |
Click Apply.
Choosing the granularity
The granularity control, next to the date range, sets how your data is grouped over time. Click it and choose an option:
Option | What it shows |
|---|---|
Entire Range | One total for the whole date range |
By day | One value per day |
By week | One value per week |
By month | One value per month |
By quarter | One value per quarter |
By year | One value per year |
To compare your range with an earlier period, see Comparing time periods.