How-To: Install Polar Pixel via a Shopify Theme
Last updated: September 17, 2026
This article details the process for installing the Pixel directly onto your store's Shopify theme.liquid and order status page.
How-to: Install the Polar Pixel
NOTE: If you are a Shopify 2.0 user and don't have the ability to install custom scripts within your theme.liquid, we're happy to configure the Polar Pixel extension for you. Please reach out to your Customer Success Manager (or our Support Team via the in-app live chat) for more guidance here).
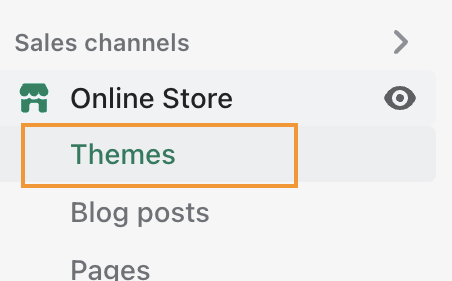
Step 1. Add the following piece of code to your theme.liquid within your store admin settings. To access that page:
Go to https://YOURSTORE.myshopify.com/admin/themes
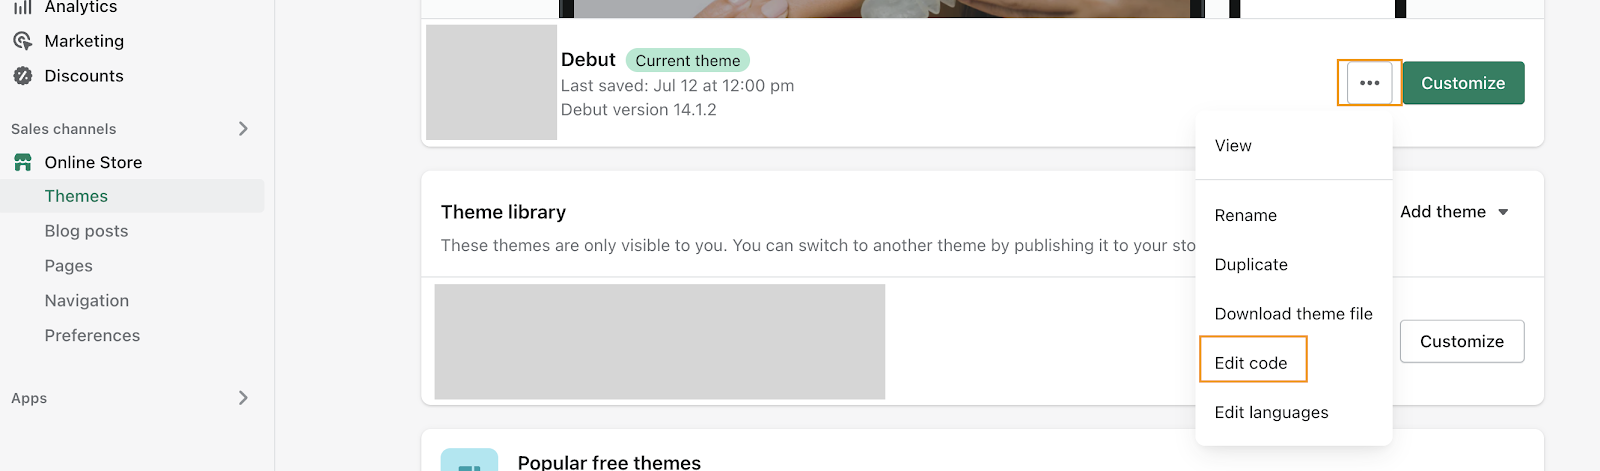
Click on the 3 dots, next to Customize, then "Edit Code".
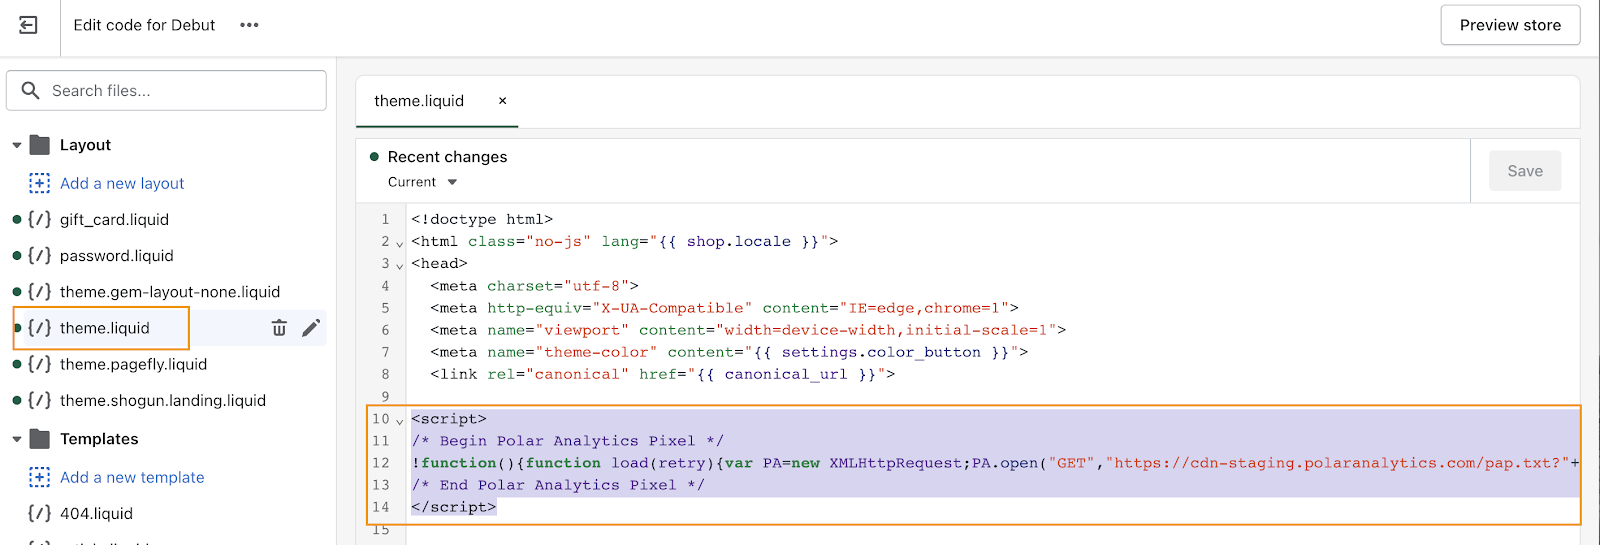
Copy and paste this script in the of the file, as high up as possible and save.
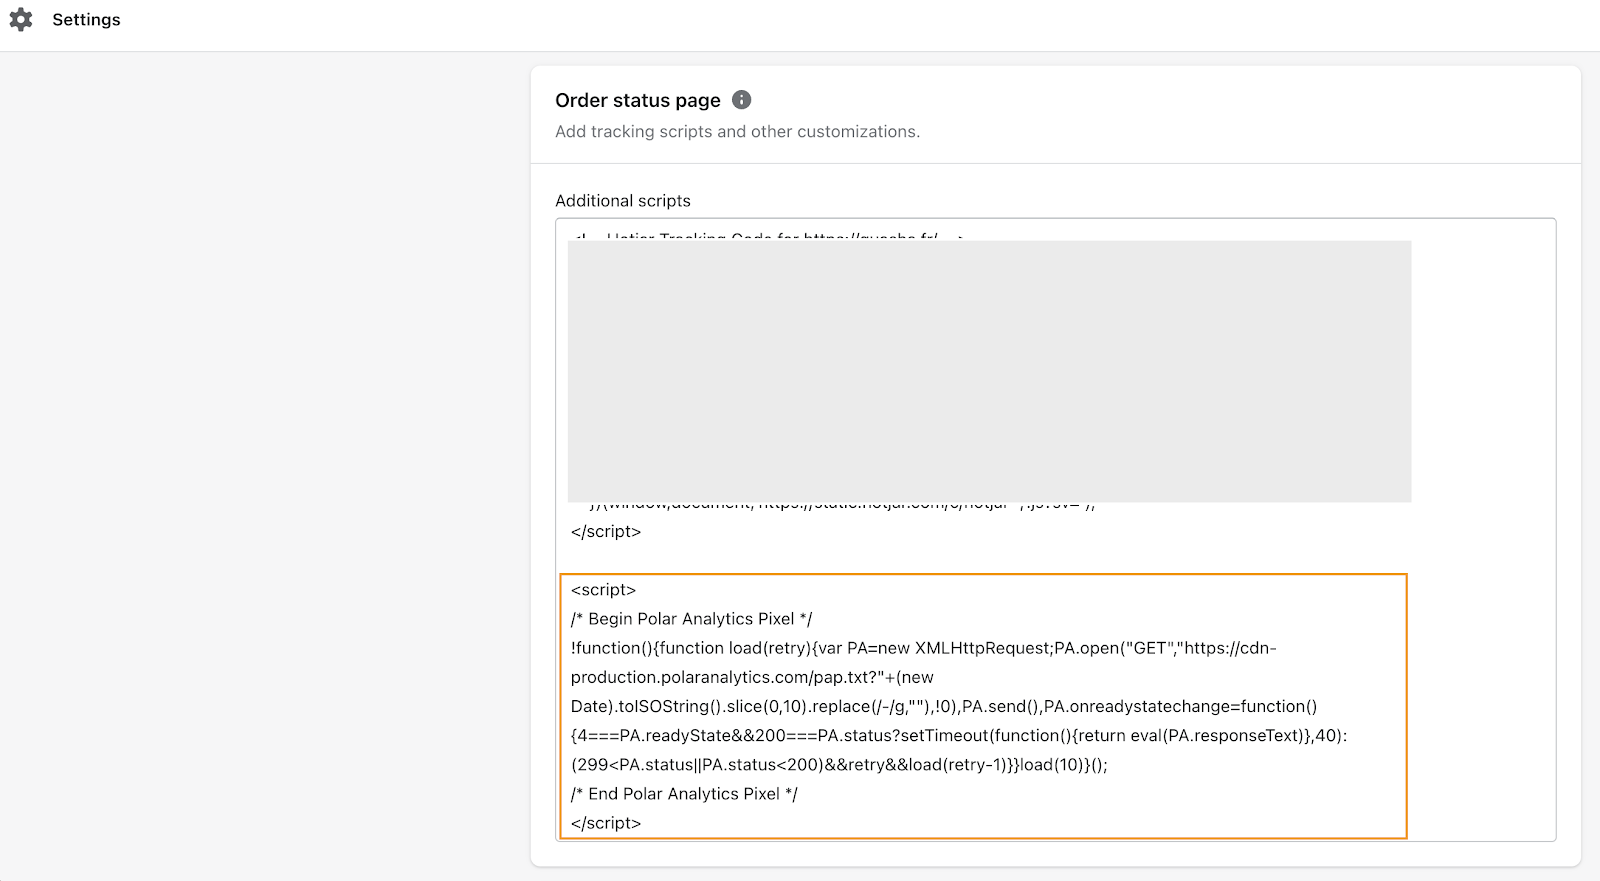
Step 2. Add the same piece of code (pasted above) to your order status page within your store admin settings. To access that page:
Go the the Settings then Checkout https://YOURSTORE.myshopify.com/admin/settings/checkout
Scroll down to "Order status page", then "Additional scripts" and Copy and Paste the script and Save.
Step 3. If you use any third-party checkout solutions other than Shopify (such as Recharge), you'll need to ensure that the Polar Pixel is also installed on those solutions. We have a few guides here on how to install the Polar Pixel on various 3rd party checkouts.
Please note that we do not currently have a way to install the Polar Pixel on:
Amazon Seller
Facebook / Instagram Checkout
TikTok Shop
However, if orders from any of the above sales channels also are sent to Shopify, we can still ensure they're tracked.
Step 4. To ensure that the Polar Pixel is as comprehensive as possible, you must properly configure the tracking parameters of your ads. We've detailed the steps for how to set your tracking parameters in a set of tracking guides here.