Add the Polar Pixel to 3rd-Party Checkouts
Last updated: September 29, 2026
For the Polar Pixel to attribute every conversion to the right channel and campaign, it needs to be installed everywhere a customer can complete a purchase. If you use a third-party checkout that sends orders to Shopify, follow this guide to add the Pixel there too.
Before you start
Check your plan. Make sure the Polar Pixel is included in your Polar plan. If you're not sure, ask your Customer Success Manager.
Get your Polar Pixel endpoint. Reach out to support through the in-app chat, or to your Customer Success Manager, to get it. You'll paste it into the script below.
Have access to your checkout's settings, so you can paste a snippet of JavaScript. This usually takes 5 minutes or less.
Supported checkouts
Don't see your checkout? Reach out through the in-app chat.
The script
Every checkout below uses the same script. Before pasting it, replace the two placeholders:
REPLACE_WITH_SHOPIFY_URL: your*.myshopify.comdomain, for exampleexample-shop.myshopify.com.REPLACE_WITH_PIXEL_ENDPOINT: the Polar Pixel endpoint you received from support or your CSM.
<script src="https://unpkg.com/@polar-analytics/pixel-sdk@0.13.0/dist/index.global.js"></script>
<script>
  try {
    window.shopifyShopURL = "REPLACE_WITH_SHOPIFY_URL";
    (async function () {
      const payloadBase = await polarPixel.generatePayloadBase({});
      const data = polarPixel.eventFactory.checkout_started({
        shopifyEventId:
          (crypto && crypto.randomUUID && crypto.randomUUID()) ||
          String(Date.now()),
        shopifyClientId: String(payloadBase.data.userId || ""),
        shopifyShopURL: String(
          window.Shopify?.shop || window.shopifyShopURL || ""
        ),
      });
      polarPixel.sendPixelEvent(
        "REPLACE_WITH_PIXEL_ENDPOINT",
        payloadBase,
        { data }
      );
    })();
  } catch (e) {}
</script>
Better Cart
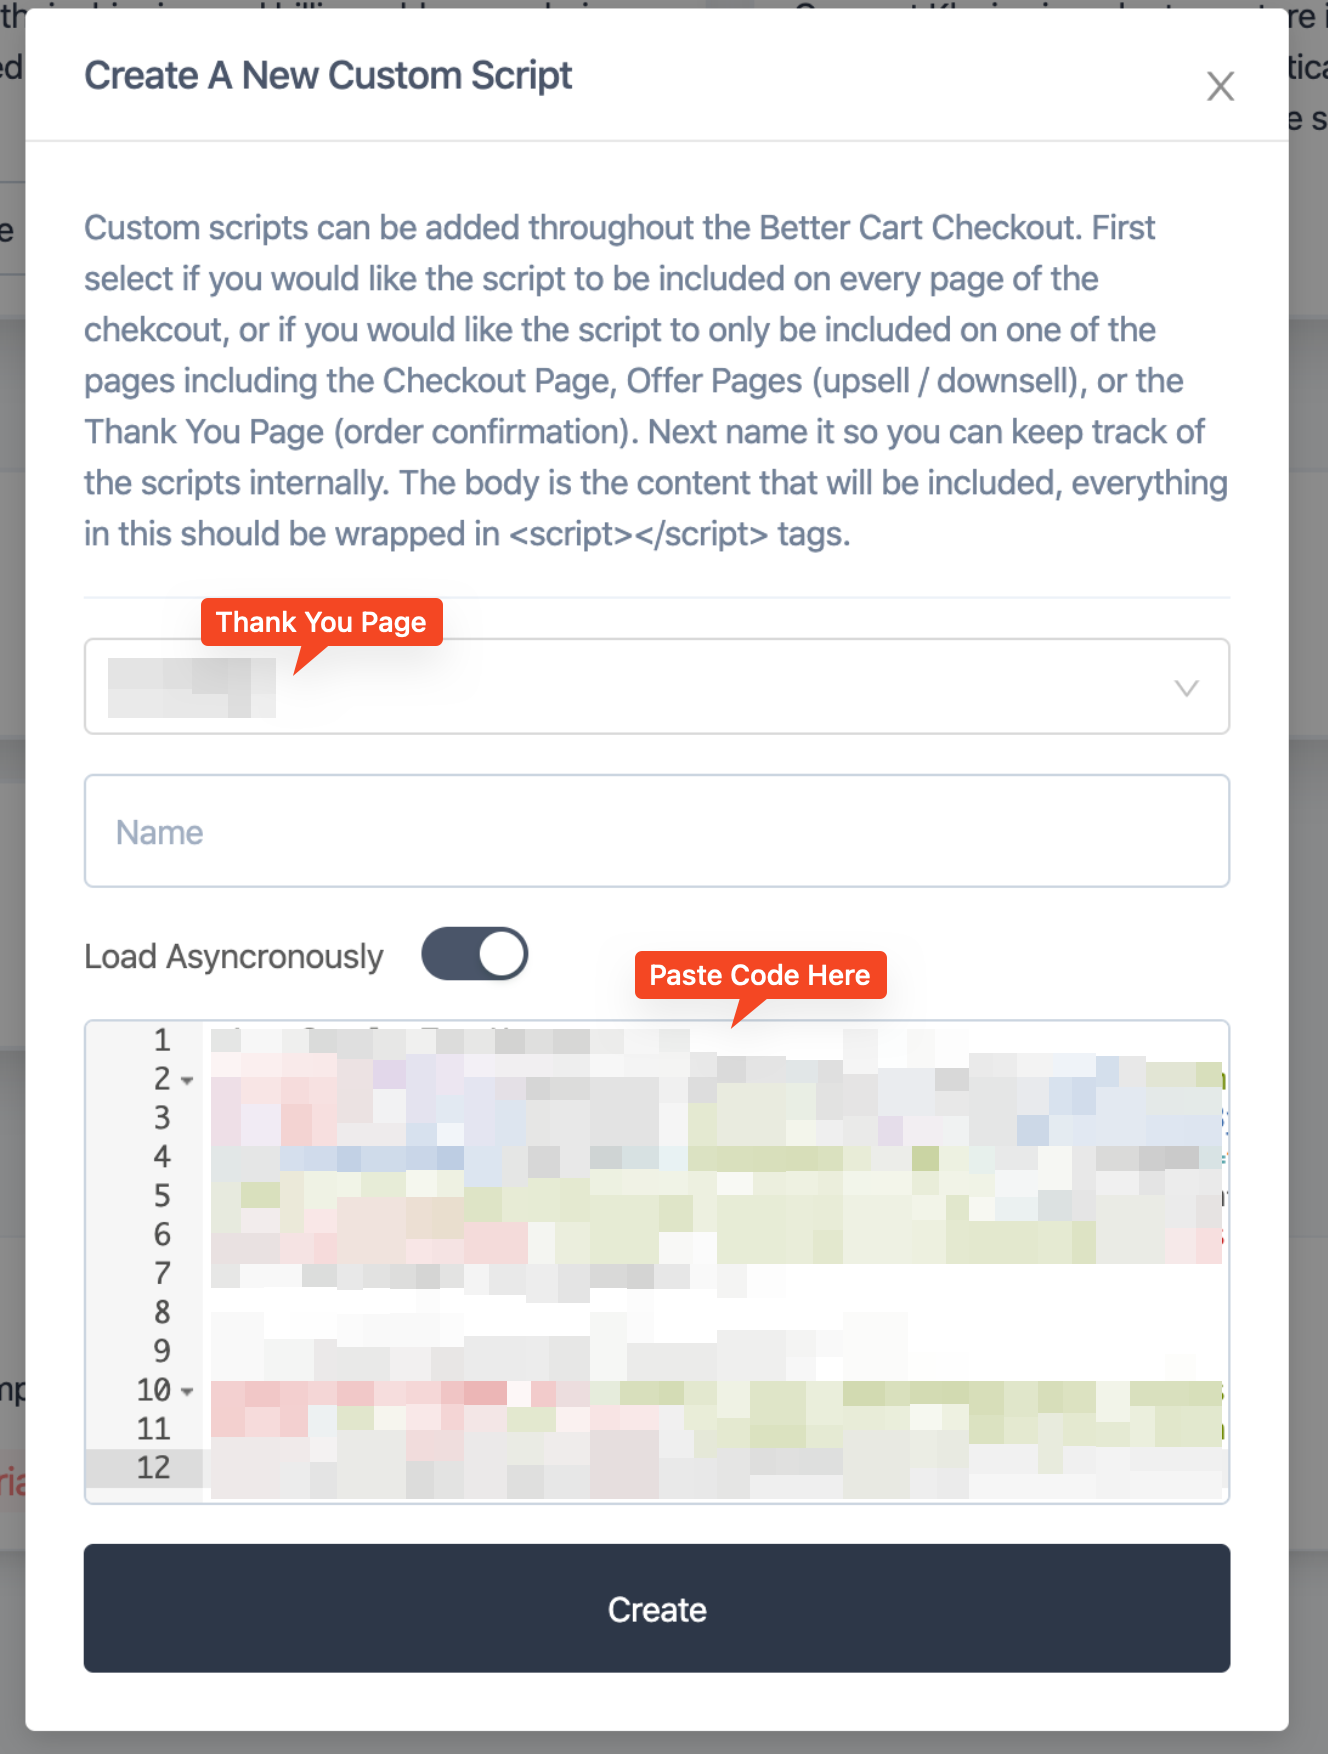
Open the Better Cart app in your Shopify store. Click Settings in the left-hand menu, then scroll down to Custom Scripts.
Click Create Custom Script.
In the dropdown, select Thank You Page and enter a name you'll recognize, such as "Polar Pixel".
Paste the script, with both placeholders replaced, and save.
Recharge (custom checkout)
Recharge has two checkouts: the Shopify checkout (the default for anyone who joined Recharge since 2020) and a custom Recharge checkout. Polar supports the Shopify checkout automatically. These steps are only for the custom Recharge checkout.
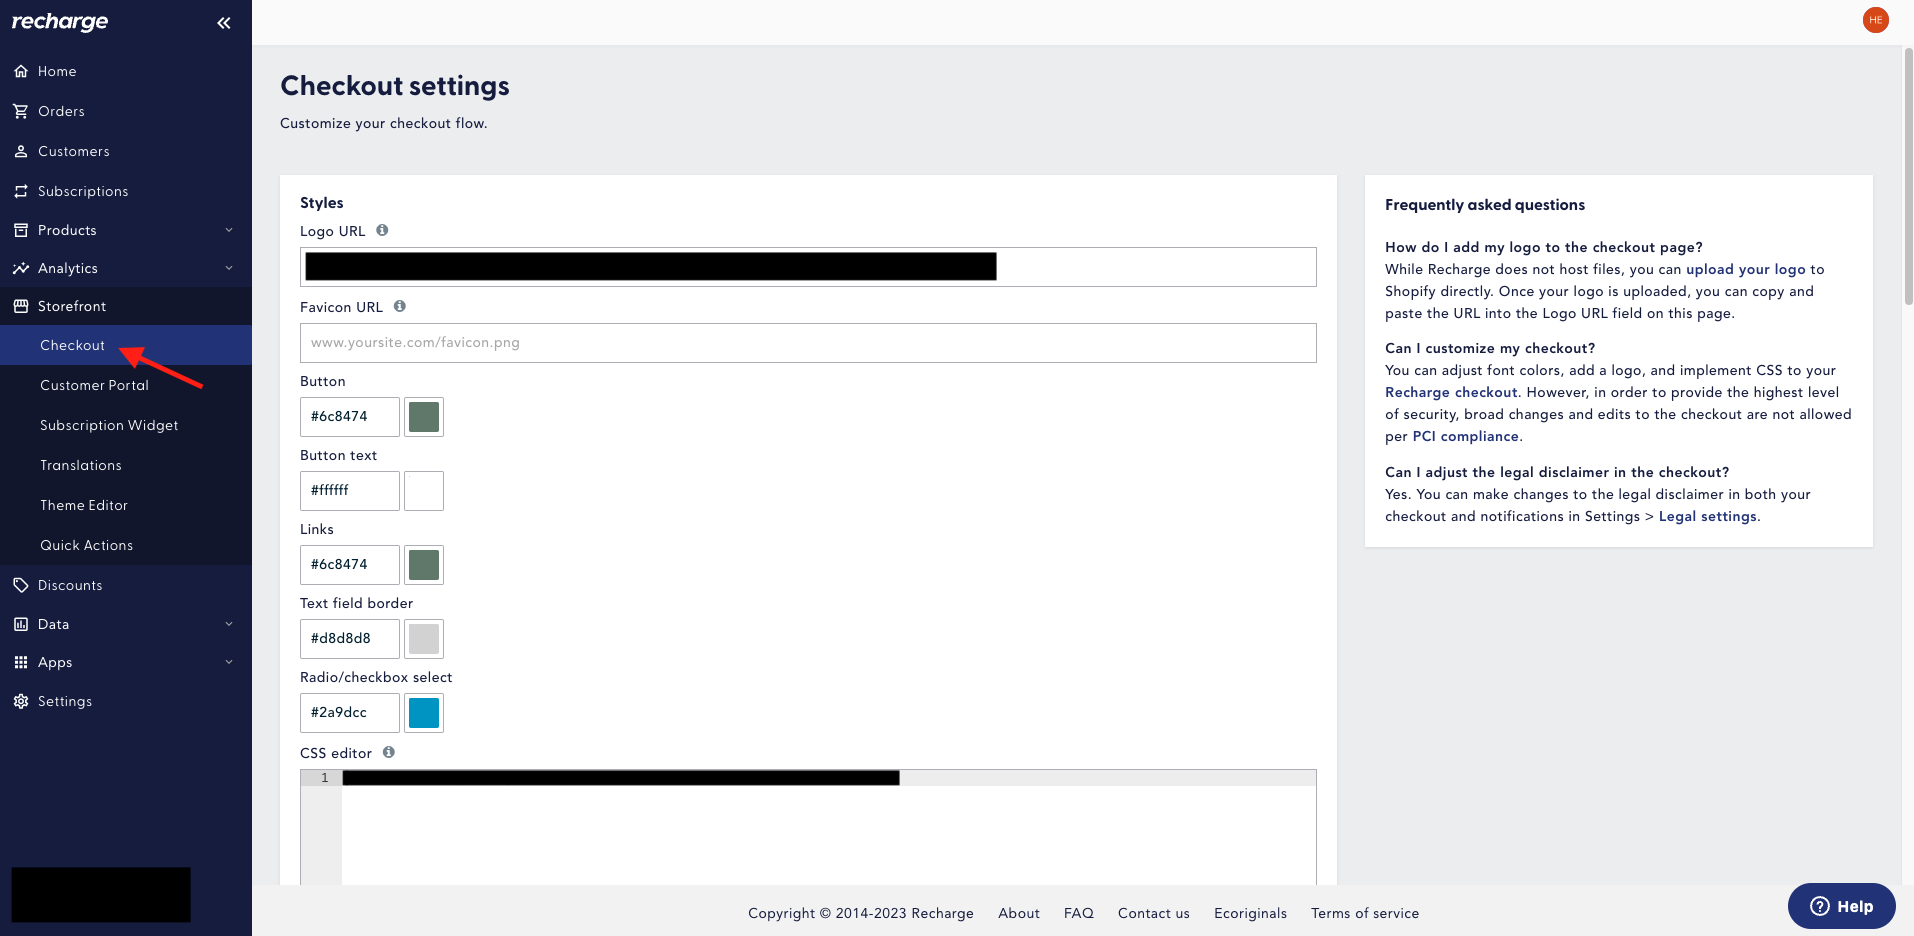
Log in to your Recharge account, go to Storefront, and open Checkout.
Scroll down to the Thank you page field and paste the script, with both placeholders replaced, alongside any scripts already there.
Save, and check that your changes were applied.
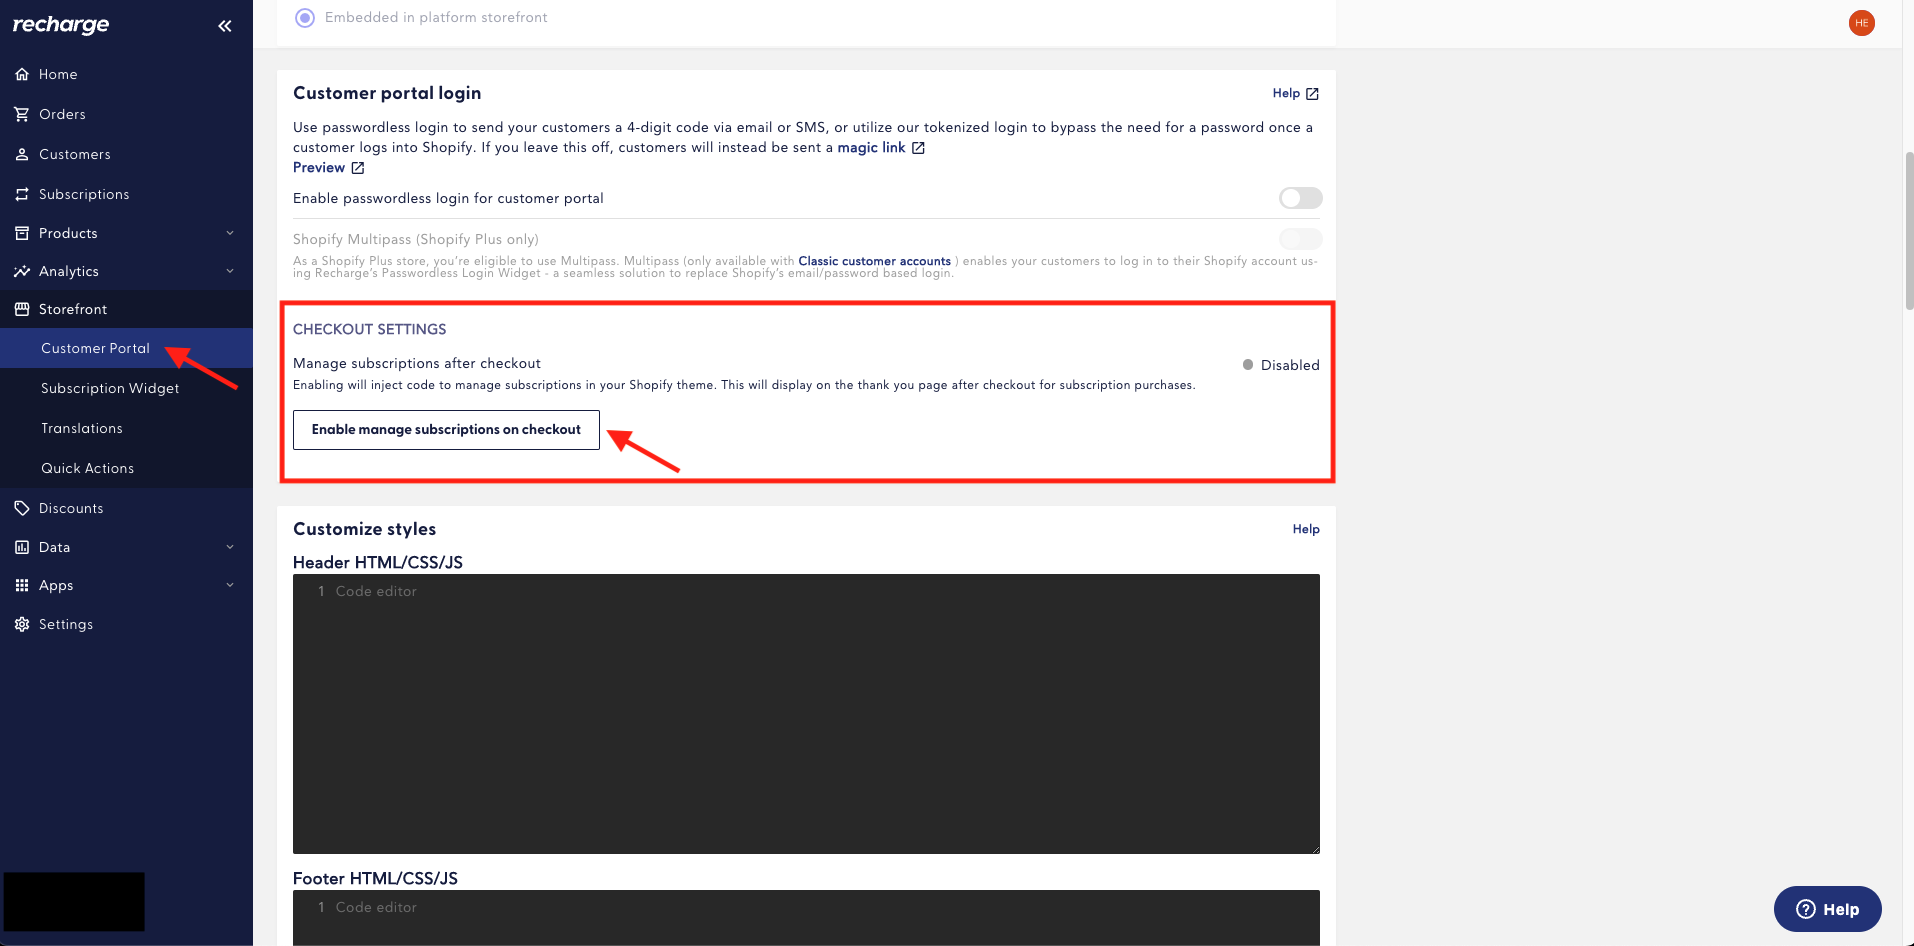
Don't see Checkout under Storefront? Go to Customer Portal, scroll to the Customer portal login field, and click Enable manage subscriptions on checkout. The Checkout section will then appear.
Upscribe
Contact Upscribe support and ask them to add the script, with both placeholders replaced, to your Thank You page.
Checkify
Go to Checkify's script settings.
For the type, select Script in the header.
For the page, select Only for Thank You page.
Enter a Script title, such as "Polar Pixel".
Paste the script, with both placeholders replaced, and click Save changes.
Funnelish
Open the Funnelish All funnels page and click the funnel you want to add the Pixel to. In the bottom left, click the Settings gear.
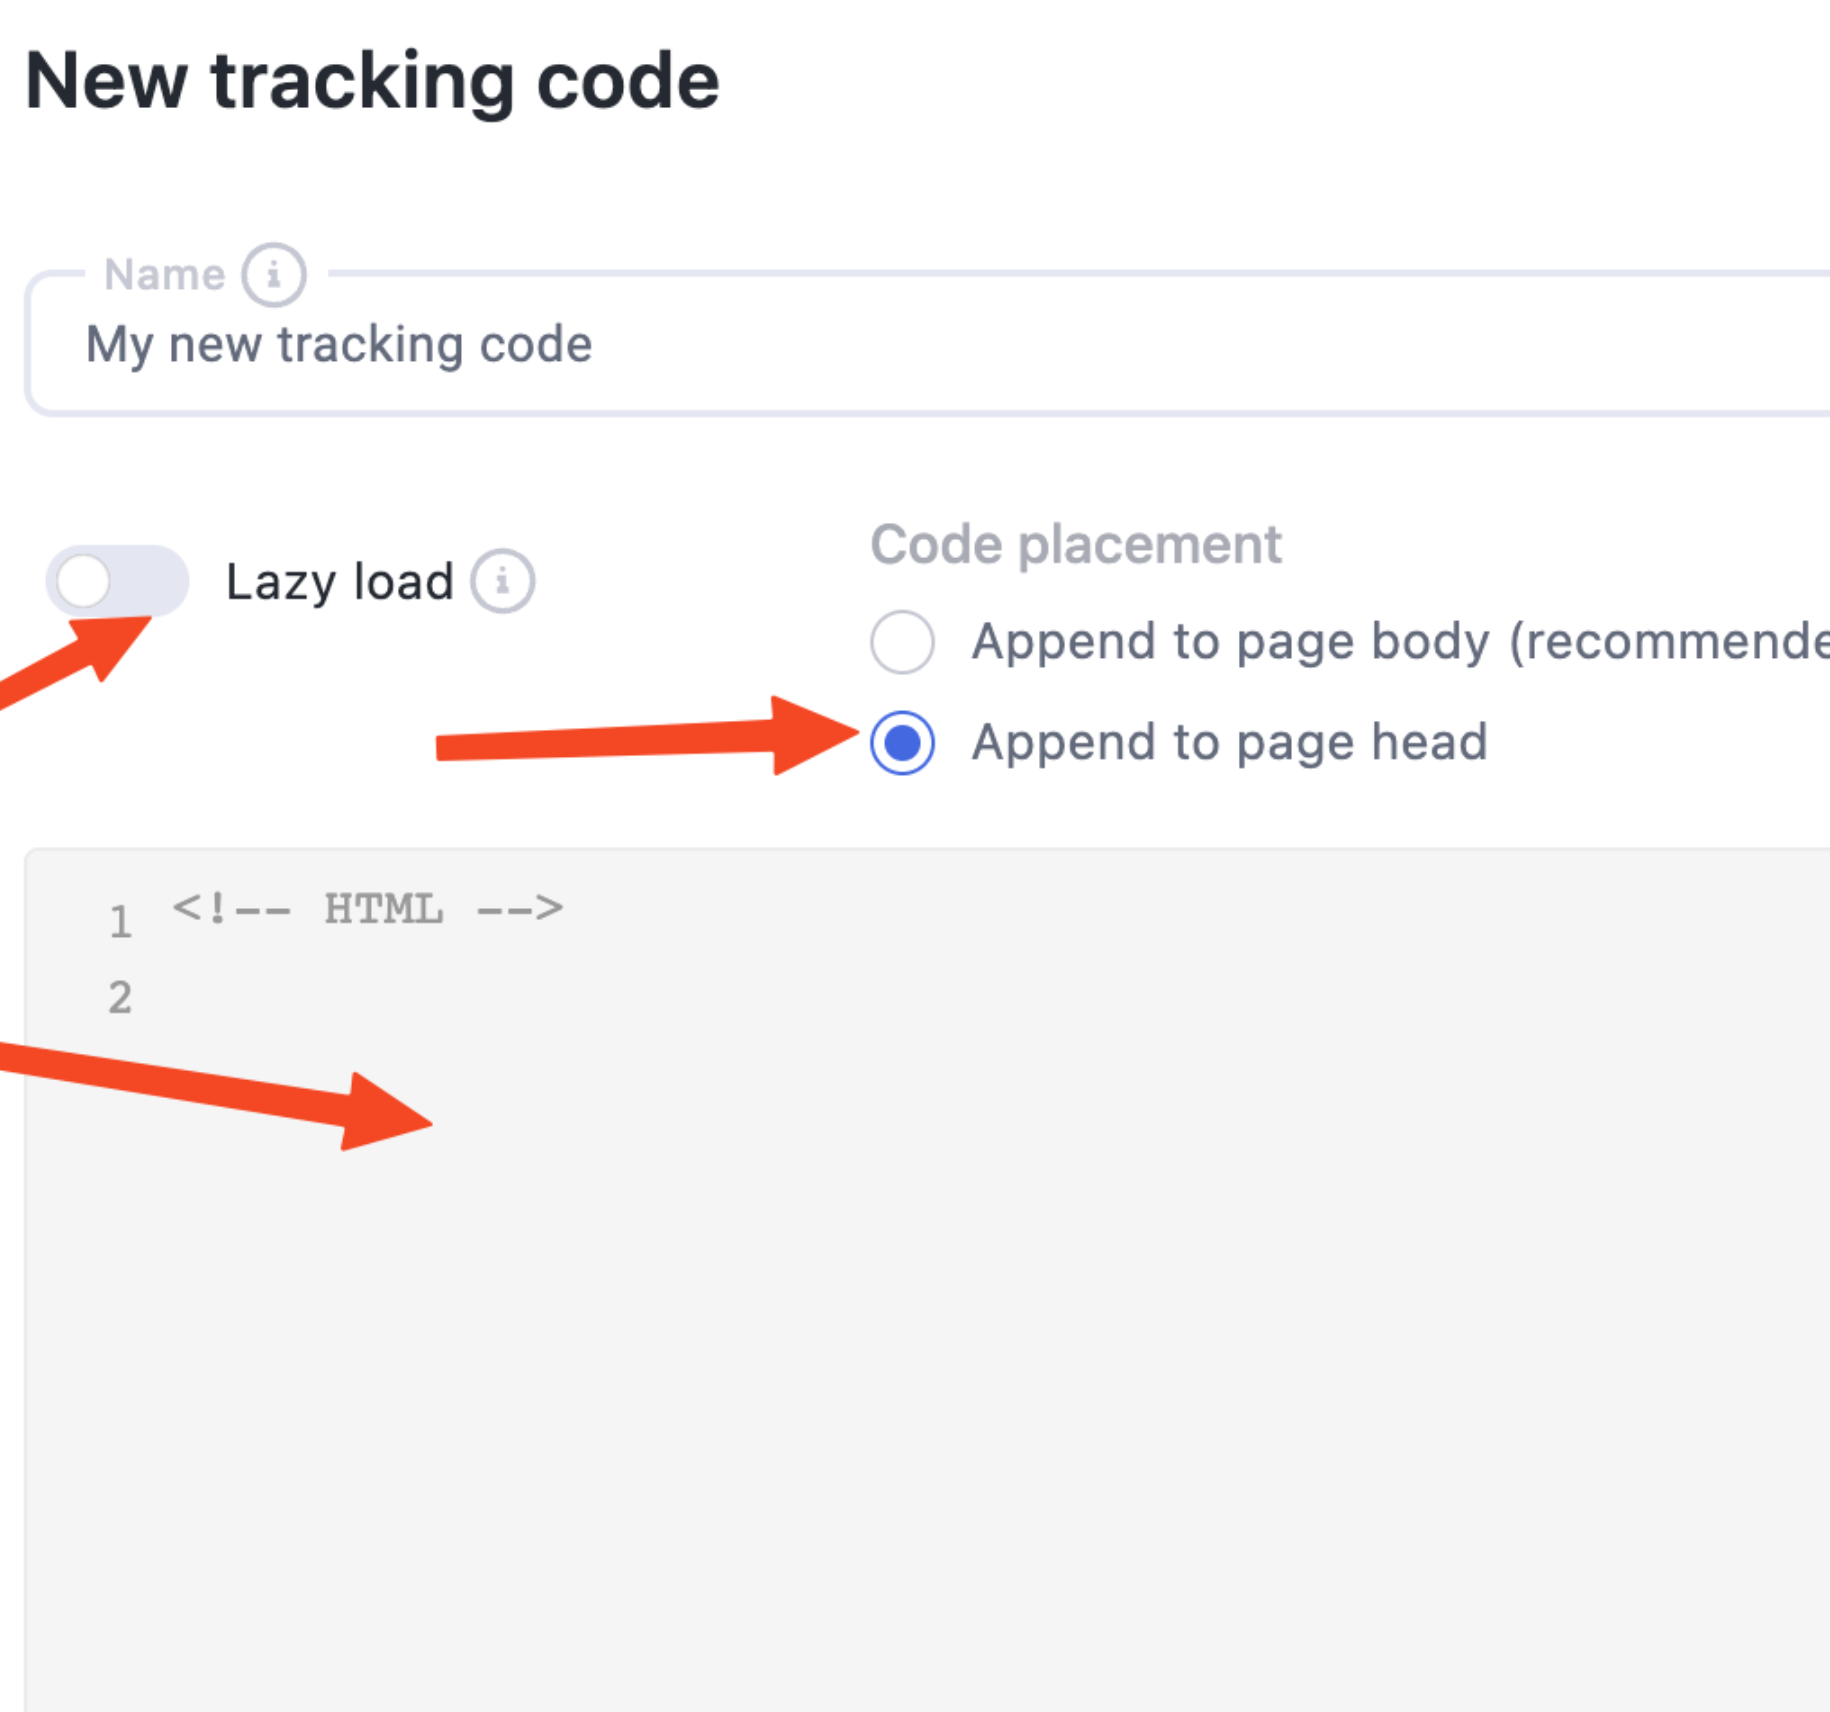
Under Custom codes, click Create a new code.
Give the code a name, turn Lazy Load off, and check Append to page head.
Paste the script, with both placeholders replaced, and click Save changes.
Other checkouts
If you use a third-party checkout that isn't listed above, a developer can install the Pixel using the Polar Pixel SDK. You'll need your Polar Pixel endpoint for this too, so reach out to support or your CSM to get it.